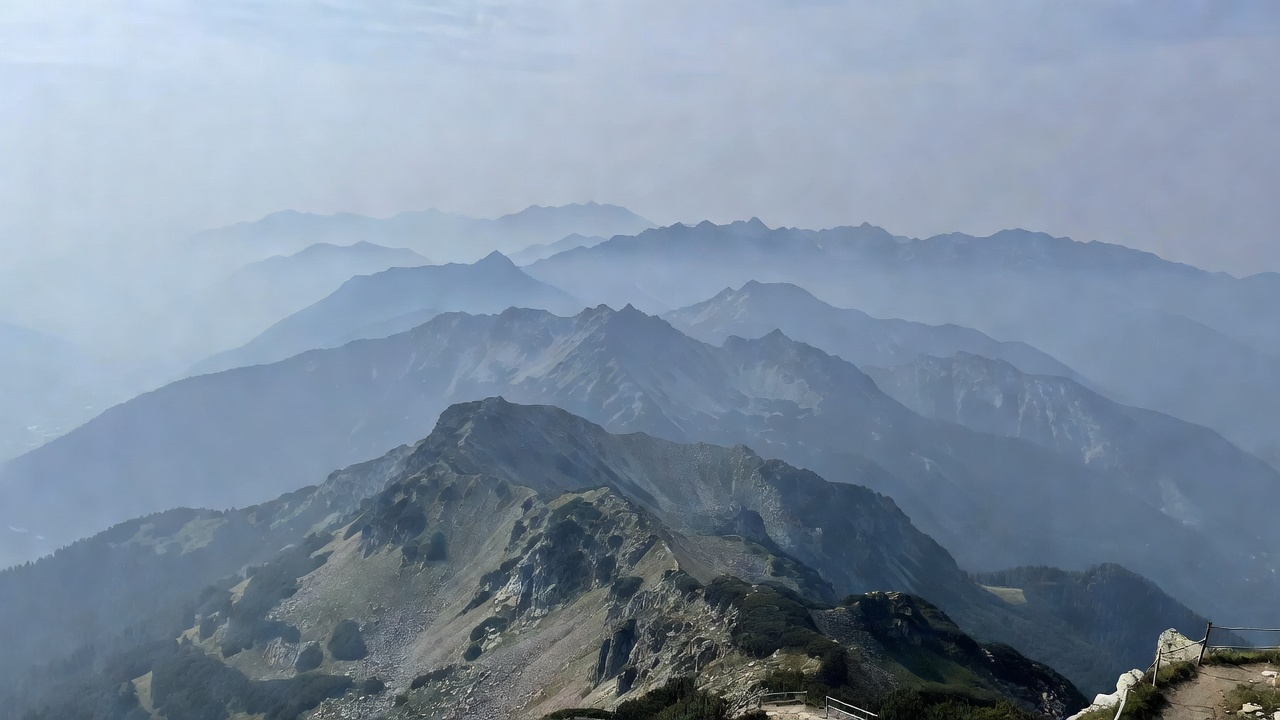
Viewpoints versus summits
A photographic viewpoint is any lawful standing place that organises terrain into readable depth. It does not need to be the highest point. Ridges that look along a valley, saddles that reveal two weather systems, and mid-height terraces with a clear foreground ledge often outperform true summits where the view is panoramic but uncomposed. Summits also concentrate wind, fatigue and decision pressure—conditions that shrink creative patience.
When evaluating a candidate, ask what sits in the near third of the frame. Bare scree can work as texture if edges are graphic; featureless short grass under a huge sky may not. Boulder piles, snow patches, path zigzags and wind-shaped shrubs can hold the foreground. If you must invent interest with extreme wide distortion alone, the location is weak for still photography even if it feels impressive in person.
Weather as structure, not backdrop
Mountain light is inseparable from cloud height, wind and visibility. Broken cloud creates moving spotlights that can animate ridges for minutes at a time. Continuous high overcast can flatten relief yet keep snow detail controllable. Valley fog beneath a clear upper ridge offers layered storytelling—if you can safely reach the overlook while the inversion holds. Treat forecasts as probability bands: wind thresholds, freezing levels and precipitation timing matter more than a single “sunny” icon.
Build turnaround times before you climb. Photography stretches stops, glove changes and composition debates into longer exposure to cold. Define a non-negotiable descent start time and keep a simpler backup framing if conditions deteriorate. Beautiful cloud does not override icing on rock steps or whiteout risk on plateau paths. The best mountain image of the day might be from a lower balcony you can revisit rather than a high push with no margin.
Depth design and focal length strategy
Mountains often provide natural aerial perspective—each ridge lighter and cooler than the one before it. Help that effect by aligning successive ridges rather than aiming at a single dominant peak floating in empty air. Side-light rakes shape; front-light on distant ranges can turn them into pale cut-outs. Early and late sun angles, when access is safe, tend to clarify form better than overhead brightness.
Wide lenses on a ridge edge can invent drama while dropping intermediate hills into insignificance. A short telephoto frequently clarifies structure by stacking forms. Carry both mental options: one environmental frame that includes working space and weather, and one compressed study of ridgelines. Avoid standing so close to a drop that your composition depends on a unsafe lean; back up and crop later, or change lens.
Access culture and shared ground
Stick to established paths and signed viewpoints unless you have the navigational skill and local permission context for off-path travel. Erosion scars widen when photographers fan out for “untouched” foregrounds. In livestock areas, close gates and keep kit low when animals move through. Winter routes may be entirely different problems from summer trail maps; do not assume a popular lookout remains a casual stroll after snowfall.
Groups and workshops can saturate small terraces. Arrive with a plan for rotating positions, or choose less famous shoulders of the same massif. Headphones-out awareness matters near edges: you need to hear people approaching behind you as much as you need to hear wind cues.
Kit realities at altitude
Cold reduces battery stamina; carry spares against your body. Condensation can hit lenses when moving between humid valleys and cold ridges—allow gradual transitions when possible and keep lens caps on during rapid descents into milder air if fogging is a known issue for your kit. Gloves that permit basic dial control beat heroic bare-handed shivering. A lightweight mid-layer you can add while stationary often matters more than an extra filter.
Filters help with glare on snow and with holding bright skies, but wind can make large filter stacks vibrate. Test stability before long exposures. For moving cloud, shorter shutter sequences may tell a clearer story than an ultra-long blur that turns structure into haze. Always keep a fast, handheld contingency if a transient beam of light appears while you are mid-setup.
Pros, cons and honest selection
Pros: strong natural depth; weather as an active compositional partner; seasonal snow lines that redraw forms; long sightlines rarely available in dense lowland scenes.
Cons: higher logistical and weather risk; shorter safe working windows; heavier physical load; limited tolerance for tripod experiments in wind; complex access in shoulder seasons.
Choose mountain viewpoints when layered landforms and changing weather are central to your intent. Choose coastal headlands when you want water motion with simpler rescue logistics. Choose open landscapes when low relief and sky gradients are enough and you need shorter approaches. Within mountains, favour known approaches, clear exit options and viewpoints that already contain a near-ground element.
Planning sequence before you leave home
Check daylight span, precipitation timing, wind on ridgelines, freezing level and path condition reports where available. Pack for the stationary cold of photography, not only the warmth of walking. Write two photo goals: a primary weather-dependent idea and a simpler structure study that still works in flat light. Tell someone your route and timing. On location, reassess at each decision point—continue, simplify, or descend—using the same calm criteria you would apply without a camera.
Mediamiclipcottag’s mountain guidance is intentionally unsentimental: a viewpoint earns a visit when the terrain, access and forecast align. When they do not, turning around is part of professional location craft.