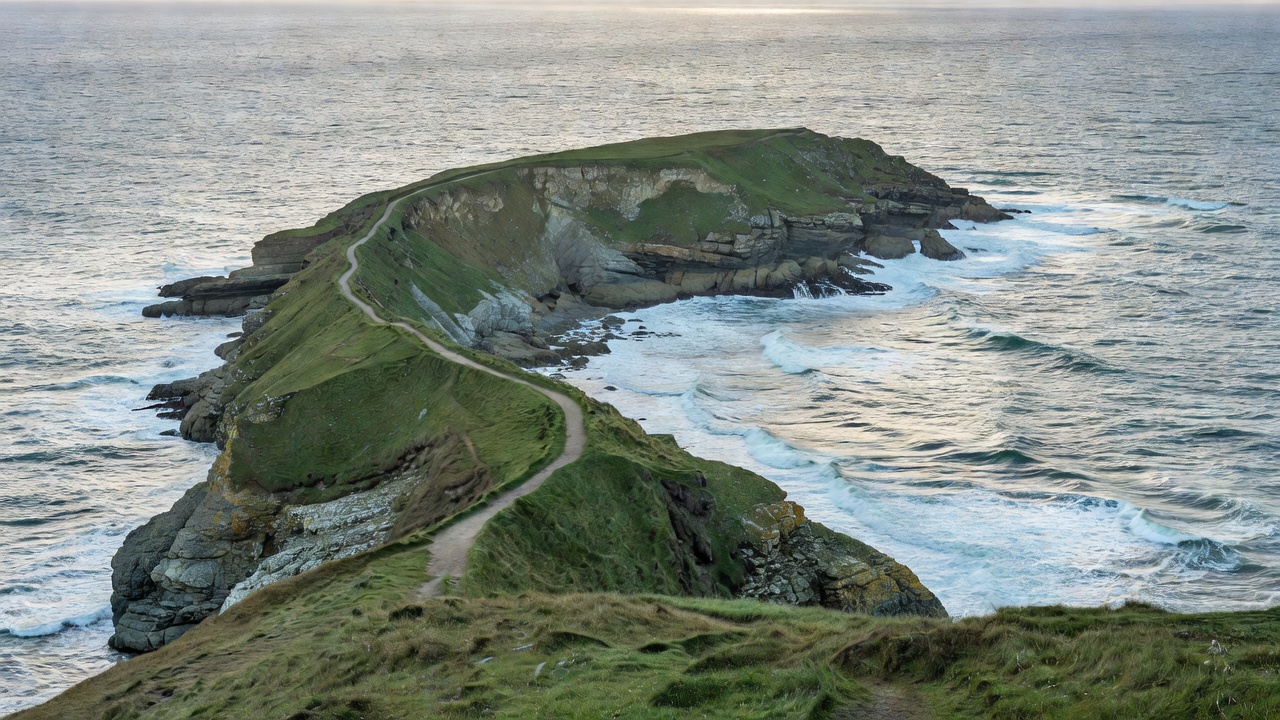
What a headland actually gives you
A headland is more than a high place beside water. Geometrically, it is a protrusion that lets you look along the coast instead of only out to sea. That side-on viewpoint creates recession: near cliff, mid-distance bay, far headland, sky. Photographers who only shoot “straight out” often miss the category’s main advantage—depth built from coastline geometry rather than from a single dramatic rock.
Useful headlands share a few traits: a stable public approach path, enough shelf or clifftop space to set a tripod without blocking others, and an orientation that catches side-light rather than flat front-light for much of the day. Tall vertical cliffs can look heroic in person and photograph as empty walls if there is no mid-ground interest. Lower, stepped headlands with reef ledges or boulder fields usually produce more workable frames.
Tides, swell and timing windows
Tidal state changes access and subject. At higher water, ledges vanish and water texture becomes the foreground. At lower water, rock platforms appear—excellent for leading lines, but also for slip hazards and cut-off routes if you descend without an exit plan. Treat tide tables as operational data, not atmosphere. Arrive with enough margin to leave before your return path floods.
Swell and wind fetch alter whether long exposures read as silk or clutter. Moderate, organised wave sets often hold more graphic structure than chaotic wind chop. If the forecast shows strong onshore wind, expect spray on glass, tripod vibration and compressed working time. Offshore or lighter cross-shore conditions are usually kinder to filters and fine framing. Build your day around the combined tide-and-swell window, not sunrise alone.
Access, edges and shared space
Prefer signed coastal paths and established viewpoints over informal cliff edges. Turf overhangs can look solid and fail without warning. Keep your tripod inboard of any obvious undercut, and treat wet grass slopes as low-friction surfaces. If a location is popular, expect social pressure to stand in fragile areas for “the shot.” That is a reason to leave, not a reason to follow.
Private coastal land, nesting season closures and temporary path diversions are common. Check local path notices before you rely on a single approach. Drones, if you use them, are a separate permission problem near settlements, nature reserves and busy cliffs; the safer creative path is often a longer focal length from a lawful standing point rather than aerial novelty.
Composition that survives real weather
Start with a scouting pass without filters: identify one near-ground anchor (ledge crack, pool, tufted grass line), one mid-coastal curve, and a far horizon break. If you cannot name those three, the headland may be scenic without being photographic for your style. Use the anchor to hold the lower third, then decide whether the story is recession along the coast or contrast between solid rock and moving water.
Wide lenses exaggerate height and can empty the mid-ground; moderate wide-to-normal focal lengths often keep relationships readable. Telephoto compressions from a setback headland can stack successive points into rhythmic bands—especially useful when the sky is plain and texture must come from landform. Guard against centring the brightest water highlight unless you intentionally want attention to leave the cliff structure.
Kit and workflow trade-offs
A stable tripod, a clean microfibre routine for spray, and a filter strategy you can change with gloves matter more than exotic glass. Neutral density filters help when you want water motion to simplify busy foam; polarisers can control sheen on wet rock but may unevenly darken wide skies—test before committing. Keep a non-filtered backup sequence so a rushed filter stack does not erase your only frames of a short light window.
Weather sealing is not immunity. Carry a simple rain cover, face the camera away from spray when idle, and wipe from the lens edges inward. If conditions degrade, switch goals: monochrome structure studies, detail frames of rock texture, or a shorter session with fewer perfect expectations. Ending with readable files is better than insisting on a single hero composition in unsafe wind.
Pros, cons and when to choose something else
Pros: natural depth from coastline recession; reliable sky–water contrast; strong motion potential; clear silhouettes at either end of the day when orientation cooperates.
Cons: exposure to wind and spray; access that depends on tide and path condition; crowds at well-known lookouts; vertical empty cliffs that photograph flatter than they feel.
Choose headlands when you need line and recession. Choose beaches or harbours when you need intimate foreground props and easier footing. Choose inland open land when the marine layer or wind makes the coast operationally poor. Headlands are a category of location, not a guarantee of drama—treat them as a planning problem first and a postcard second.
A practical decision checklist
Before you commit travel time, ask: Is the approach public and intact? Does the tide open or close my preferred foreground? Is the wind direction manageable for glass and balance? Does the headland face a useful light angle during my available hours? Can I name a near, mid and far element from a phone sketch? If three or more answers are weak, reschedule or pick another coast segment rather than forcing the category.
Mediamiclipcottag’s approach is deliberately conservative: good coastal work comes from repeating a few well-understood headlands through seasons until you know their honest windows—not from collecting edges you have never studied under indifferent weather.